
- compositions
- key frames
- manipulating objects
- effects & presets
- time line
- layers/modes
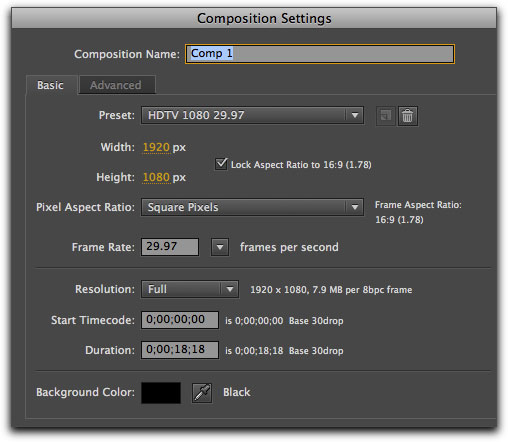
When creating a composition the frame rate must be set at 25 frame rates per second with a aspect ratio of 16:9
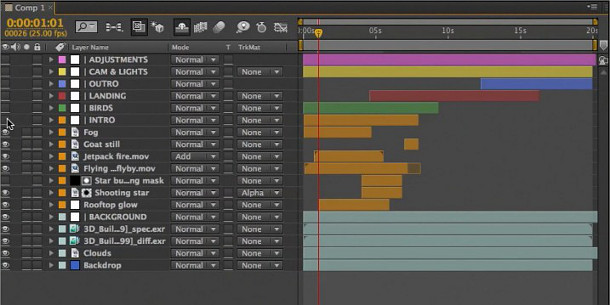
Similar to Photoshop and premiere pro individual content can be layered on top of each other, with the help of the various different blending options located near the timeline, this then effects visually how they all appear

Masking can be used for
- transitions
- animating
- creating special effects

When you have uploaded footage that appears to be a bit shaky and unstable, warp stabilizer allows you to keep the footage consistently stable and smooth, without any worry of any unexpected movement.
Summary
Although I am already comfortable using the visual effects software Adobe After Effects CS6 and now currently CC, it was refreshing to look over some of the tips and helpful information regarding how to operate the software. For example I did learn learn a lot more about the importance of RAM, frame rates and aspect ratios.
Animating Stills Animation
14/02/14
Key Frames compositions & Green Screen
- · Key frames
- · New solid
- · Creating another solid
- · Then create a mask ( circle)

- · To move the anchor point select the pan behind (anchor point tool) then select and move
- · Rename layer
- · Toggle mask icon to hide mask
- · Create key frame at 0 then move ball to 2 seconds
- · Control c and control v to copy and paste key frames
- New comp
- · Swap ratio size
- · New solid and mask solid to make a ball
- · Put anchor point in the center
- · Position on the edge of the screen
- · Create key points at start and finish then at the middle adjust position so it curves down
- · Select first key frame select the red handle and drag
- · Select pen tool to modify handles

- · Select graph editor icon
- · Graph lines will only appear when you select something

When dragging on handle it
can affect the speed of the object
·
Create
new compositions for 3 screens
·
The
create a master comp wich all screens will appear (set to original ratio size)
·
Adjust
comps with different colours &text (usea a solid)
·
Then
drag original comp in the new comps and adjust positioning

·
Adjust timeline size by
dragging bar to the size you want right click then select ‘trim to comp’
New
comp
Width 3240
height 1920


Create a new comp and move it in to each
composition
green screen/Key light

Key points
·
Track motion
·
Key light
·
Tracker points
·
Experiment with screen matte
No comments:
Post a Comment